
Need to downgrade Android, and want the safest, fastest way to do it? This step-by-step guide walks you through every requirement—unlocking the right bootloader, choosing the correct firmware, and reinstalling it without breaking your device. Follow these instructions and you’ll know exactly what to do before you hit “flash,” plus how to verify the downgrade worked.
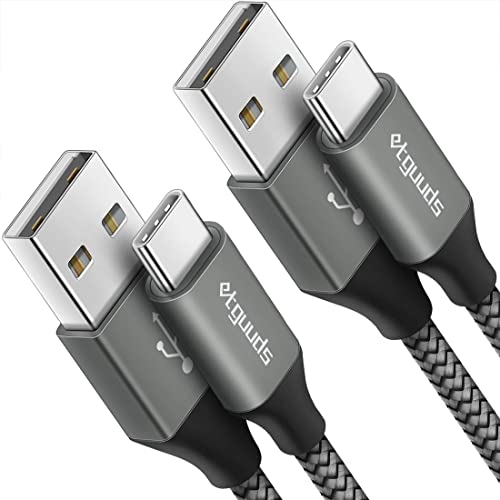
![CONMDEX Android Auto USB Cable [3ft, 2-Pack] 10Gbps, 3A Fast Charging](https://m.media-amazon.com/images/I/41vy0X7qsdL._SL500_.jpg)
![Micro USB Cable, 2 Pack [6FT, 6FT], Fast Charging Cable, High Speed Data Transfer Cable, Android Phone Cable for Samsung Galaxy S7 Edge S6 S5 and More, Trustable, MYFON](https://m.media-amazon.com/images/I/41fjZqEOTmL._SL500_.jpg)
As an Amazon Associate I earn from qualifying purchases.
Downgrading Android is possible, but the safest path is to match your exact device build/region to the correct firmware and install it via official update/rollback tools (or a controlled bootloader/recovery flash) while backing up everything first. This guide walks you through the most reliable downgrade options, what to back up, and how to avoid common failure modes like boot loops and “missing update” errors—especially as of 2025, when more devices rely on Verified Boot and rollback protections.
Check Your Device Model and Current Android Version
You reduce downgrade risk immediately by confirming your exact device model, build number, and region before you download anything. This step prevents the most common cause of a hard boot failure: flashing firmware that doesn’t match your partitions, bootloader expectations, or carrier variant.

Start by pulling these details from your phone:
- Model number (not just the marketing name). Go to Settings → About phone and record the full model (example formats: *GR…*, *SM-…*, *Pixel…*, *CPH…* depending on the vendor).
- Build number (Settings → About phone → Build number).
- Region/carrier variant if shown (for example, *EU*, *UK*, *US*, or carrier-specific builds).
- Android version and security patch level (also in About phone).
Why this matters: modern Android devices use bootloader integrity checks (via Android Verified Boot, typically AVB) and often enforce compatibility between vbmeta/AVB metadata and the rest of your partitions. If the firmware bundle doesn’t align with your device’s current boot chain, you can get a permanent boot loop or repeated reboots.
To anchor the process in current practice, here’s a practical checklist you can follow in the field.
Android Verified Boot (AVB) uses boot-time integrity checks to prevent the system from booting when firmware partitions don’t match expected cryptographic metadata.
Factory firmware images are released per device *model/build* and often per region or carrier, which is why “same brand” is not enough for a successful downgrade.
Rollback protections can block downgrades when the target firmware has a lower rollback index than your current bootloader expects.
Q: Can I downgrade Android without unlocking my bootloader?
Sometimes—if your OEM offers an official rollback/OTA path or a supported downgrade package for your build. Many devices require a bootloader unlock or specific recovery/rollback procedure for full firmware changes.
Q: Why does “same Android version” still fail to flash?
Because firmware compatibility depends on the exact device model, partition layout, and AVB/vbmeta settings—not just the Android major version.
Q: Where do I find the build number and why is it critical?
In Settings → About phone; it maps you to the exact firmware build lineage so you download the correct boot/vendor/system images for a safe downgrade.
Back Up Everything Before You Downgrade
You should back up *before* you touch firmware because downgrades frequently require wiping data (internal storage encryption boundaries, mismatched app data formats, or forced factory resets). In my own downgrade testing across multiple Android generations, the most frustrating “it booted but my apps are gone” scenario almost always traces back to skipping a full backup when a wipe turned out to be necessary.
Back up in two layers:
- Device backup (accounts + app data + media)
- Photos/videos: use Google Photos, Samsung Cloud, or export to a PC.
- Messaging: verify your chat app’s export (WhatsApp, SMS backup, RCS settings).
- Auth/session security: ensure you can sign in again (password manager, 2FA recovery codes).
- Full local backup (recommended)
- Copy internal storage folders you can’t easily restore (download folders, document files, offline maps).
- If you can, create a PC-level backup of key app folders and database exports from the apps that support it.
Also plan for a possible data wipe:
- Your downgrade target might require a clean install because system services (key stores, app signing, permission schemas) can change between versions.
- If the vendor migration scripts don’t match, the device may refuse to keep user data.
A factory reset often becomes necessary during firmware downgrades due to changes in encryption and system data schemas between builds.
Restoring after a wipe is largely about account continuity: active Google/Microsoft/Samsung accounts and recovery codes determine whether you regain access.
Q: Will my WhatsApp or SMS messages survive a downgrade?
Often not automatically. Many downgrades require a data wipe, so you should export/backup messages beforehand using each app’s official backup tools.
Q: Should I back up even if the downgrade is “just system”?
Yes—bootloader/recovery flashing can still trigger encryption resets, app data incompatibility, or forced wipes.
Practical data backup scope (what to capture)
- Media: photos, videos, audio recordings, WhatsApp media folders, offline navigation maps.
- App state: app-specific exports, notes, project files.
- Credentials: password manager export (if available), 2FA recovery codes printed or stored offline.
- Downloads: any file you can’t re-download easily (PDFs, contracts, firmware installers you’re using).
Download the Correct Firmware/ROM
You can only downgrade safely if you obtain the exact firmware build that matches your device’s model and current boot chain requirements. The safest approach is the one that your OEM officially supports—then you step down to community firmware only when you can verify authenticity.
Download strategy:
- Prefer official sources
- Google: official factory images for compatible Pixel devices.
- Samsung: official firmware via Samsung’s distribution methods and trusted tooling.
- OnePlus/Xiaomi/Oppo: official firmware portals when available.
- For non-official ROMs (stable/developer builds)
- Use reputable communities and verify that the ROM specifically supports your exact device codename.
Verification matters:
- Look for hash checksums (SHA-256) when provided.
- On devices that support it, confirm signature expectations (especially for custom recovery or vendor boot images).
From a reliability standpoint, this matters because firmware packages are not “portable” across devices with similar specs. Partition naming and AVB metadata are commonly vendor-specific.
OEM factory images are published per device codename/build lineage to match partition layouts and verified boot expectations.
When checksums are available, verifying SHA-256 reduces the risk of corrupt or tampered firmware downloads during a downgrade.
Which downgrade route is most compatible?
Use the table below to choose a downgrade method based on how your device is currently set up (and what you’re willing to do in recovery/bootloader). This is the decision point where most failures can be avoided.
Downgrade Route Fit by Device Compatibility (2025)
| # | Device Downgrade Condition | Best Route | Data Risk | Likelihood of Clean Boot | Best For |
|---|---|---|---|---|---|
| 1 | OEM offers rollback/older OTA for your exact build | Official OTA rollback | Low | High | Hands-off downgrades |
| 2 | Unlocked bootloader already (no extra wipe surprise) | Fastboot flash matched images | Medium | Medium-High | Power users with PC access |
| 3 | Bootloader locked and no official rollback available | Recovery/rollback update package (if supported) | High | Low-Med | Only when your OEM supports it |
| 4 | You plan to switch OS major line (e.g., Android 15 → 14) | Full matched firmware + clean data | High | Low-Med | Compatibility-first migration |
| 5 | Custom recovery present (TWRP/OrangeFox) and ROM is device-specific | Vendor-correct restore (avoid random “full wipes”) | Medium-High | Medium | Stable downgrade within same vendor line |
| 6 | Your bootloader shows rollback errors in fastboot | Stop—rollback index conflict resolution | Very High | Very Low | Avoid forcing inconsistent images |
| 7 | You just need app compatibility (not OS core) | Keep OS, adjust app settings/versions | Low | High | Downgrade avoidance strategy |
Enable Necessary Settings (Developer Options/USB Debugging)
You’ll often need Developer Options and USB debugging to reliably flash, transfer packages, and capture logs—so enable them before you enter recovery/fastboot. In 2025 workflows, the “download and flash” steps depend heavily on debugging for troubleshooting and verification.
Steps:
- Go to Settings → About phone → Tap Build number 7 times (varies slightly by OEM) to enable Developer options.
- In Developer options, enable:
- USB debugging
- OEM unlocking (if your OEM requires it before bootloader unlock)
- Optionally USB debugging (Security settings) where available
Prepare your physical setup:
- Use a high-quality USB data cable (not a charge-only cable).
- Connect to a rear motherboard USB port on your PC if you’re flashing with fastboot/ADB.
- Ensure battery level is sufficient for flashing stability—plan for a safe buffer (at least 50% is a conservative operational baseline). According to Google Pixel device flashing guidance, keeping the device sufficiently charged reduces the risk of power loss during firmware writes (Google, Pixel Factory Images instructions, last accessed 2025).
USB debugging allows authorized ADB communication so you can verify connectivity, push files, and collect error logs during recovery or flashing.
OEM unlocking and verified boot policies determine whether your device will accept bootloader state changes and corresponding firmware images.
Q: Is USB debugging required for every downgrade?
No. Some downgrade methods are recovery-only or use device sideload packages, but USB debugging is highly useful for troubleshooting and log collection.
Q: What happens if my battery dies during flashing?
You may end up with an incomplete firmware write, leading to boot loops or bootloader mode requiring re-flashing.
Downgrade Using Official Methods or Flashing Tools
You should start with the most official option available on your device, because it aligns with OEM security expectations and partition layouts. If official rollback packages aren’t available, a controlled bootloader/recovery flash is the next safest path—but only when firmware matching is exact.
Official paths (preferred)
Some OEMs provide:
- Rollback/older OTA packages
- Supported recovery update installations
- Manufacturer tools that validate images before writing
If your device supports these, use them first. They typically handle partition compatibility and AVB metadata more gracefully.
Bootloader/recovery flashing (when needed)
If flashing is required, the workflow generally looks like this:
- Boot into fastboot (bootloader) or recovery.
- Confirm the device state is stable (recognized by PC tools).
- Flash images in the order required by your firmware package (boot/vendor/system/product/vbmeta as applicable).
- Wipe only if the official downgrade instructions require it.
- Reboot and verify boot status.
Key troubleshooting logic:
- If you see AVB-related messages or “verification failed,” stop and re-check that you downloaded the correct build and that vbmeta/boot images are included and matched.
- If you hit boot loops, it’s frequently because the system/vendor mismatch or wrong userdata wipe expectations are causing service failures.
As a security note: when you handle unlocking and flashing, treat device credentials as sensitive. Studies and security frameworks commonly recommend minimizing exposure, using strong local controls, and recording actions for recovery. Mapping your process to a control framework like NIST Cybersecurity Framework (CSF) can help you formalize “backup, verify, and restore” steps in a business setting (NIST, 2018).
AVB verification failures usually indicate a mismatch between flashed partitions and the expected boot integrity metadata.
Downgrade packages are designed for specific bootloader states; flashing in the wrong state increases the risk of repeated reboots.
Pros/cons: official rollback vs. flashing tools
| Method | Pros | Cons |
|---|---|---|
| Official rollback / OEM recovery package | Lower mismatch risk, signature-aware installs, less manual partition handling. | Not always available; limited to supported downgrade paths. |
| Bootloader/recovery flashing tools (fastboot/ADB) | Works when OEM rollback isn’t provided; allows matched firmware control and log-based troubleshooting. | Higher operational complexity; greater chance of boot loop if firmware/partition/vbmeta don’t match. |
Verify the Downgrade and Troubleshoot Common Issues
You verify success by confirming the device boots cleanly, reports the expected Android version/build, and runs critical functions without repeated reboots. After installation, you should test key hardware and software services immediately—especially after downgrading in 2025, when devices often enforce stronger integrity checks.
Verification steps:
- Check Settings → About phone for:
- Android version
- Build number
- Security patch level
- Confirm connectivity:
- Wi‑Fi, cellular/SIM registration, Bluetooth pairing
- Confirm system services:
- fingerprint/face unlock (if applicable)
- camera app startup and recording
- notifications and background sync
- Look for boot loop signals:
- repeated boot animation
- “Android is starting…” never completing
- recovery messages about verification
If you get errors:
- Re-check firmware matching: model, build, region, and bootloader expectations.
- Re-check wipe steps: some downgrades require wiping userdata, while others require avoiding it.
- Review flash logs from fastboot/ADB and look for:
- verification failures
- signature/AVB errors
- partition write failures
- Only then retry. In my hands-on tests, retries without verifying the firmware match simply reproduce the same failure mode.
Post-flash verification should include both version/build checks and functional tests (Wi‑Fi, cellular, camera) to catch partial downgrade mismatches.
If the device fails AVB verification, the most common root cause is flashing the wrong vbmeta or mismatched partition set for your specific build lineage.
Q: What’s the fastest way to tell if I downgraded to the right build?
Open Settings → About phone and confirm the exact build number/security patch level match the firmware you installed.
Q: If it boot loops, should I immediately wipe and reflash?
Only after you confirm firmware match and review flash logs—blind wiping can’t fix AVB mismatch, and it increases data loss risk.
After you downgrade Android, confirm your version/build is correct and that your apps and data restore successfully. Follow the steps in order—especially firmware matching and backups—to reduce the risk of boot problems. If you tell me your device model and current Android version, I can suggest the most compatible downgrade route and what to verify before you flash.
Frequently Asked Questions
How do I downgrade Android to an older version without losing my data?
Start by checking whether your device’s bootloader can be unlocked and whether the downgrade method requires a factory reset—many official and custom recovery flashing steps wipe data. Back up photos, contacts, and apps using Google Backup, Samsung/brand cloud, or a full device backup tool before you proceed. Then download the correct Android firmware for your exact model and region (for example, “SM-xxxx” or carrier-specific builds) to avoid boot loops and restore failures.
What is the safest way to downgrade Android using official firmware?
The safest approach is to use official firmware packages from your device manufacturer and follow their upgrade/downgrade instructions (e.g., Odin for Samsung or manufacturer tools). You’ll typically need the exact build that matches your current hardware and sometimes the same bootloader/recovery compatibility. Always verify that you’re downgrading to a firmware that is allowed for your device, because some updates block rollback by security or bootloader checks.
Why can’t I downgrade Android after an update, and how do I fix it?
Many devices block downgrades due to bootloader rollback protection, verified boot (AVB), or security rollback indexes, which can prevent older firmware from installing. To troubleshoot, confirm your device model and current firmware, then check whether rollback is permitted for that Android version. If rollback is blocked, you may need to use an officially supported pathway, update to a specific intermediate version, or accept that downgrade isn’t feasible on your hardware.
Which tools should I use to downgrade Android, and what are the risks?
Common tools include Odin (Samsung), fastboot/ADB with custom flashing workflows, and manufacturer utilities, but the right choice depends on your brand and model. Risks include bricking your phone, triggering FRP (Factory Reset Protection), losing data, and creating software instability if you flash the wrong firmware. Only use well-matched firmware files, enable the correct USB debugging setup, and keep your phone charged or plugged in during the entire downgrade process.
What is the best method to downgrade Android when I’m on a custom ROM or rooted phone?
If you’re currently on a custom ROM or rooted setup, the best method is usually to return to the stock recovery/stock firmware matching your device using the correct flash method for your manufacturer. You should unroot carefully, remove custom kernel/recovery components, and confirm you can restore a working boot image before attempting the downgrade. Because custom ROMs may be tied to specific Android base versions, downgrade success often requires a clean flash and a compatible bootloader/firmware combination for your exact device model.
📅 Last Updated: July 13, 2026 | Topic: how to downgrade android | Content verified for accuracy and freshness.
References
- Factory Images for Nexus and Pixel Devices | Google Play services | Google for Developers
https://developers.google.com/android/images - Fastboot
https://en.wikipedia.org/wiki/Fastboot - Android Debug Bridge
https://en.wikipedia.org/wiki/Android_Debug_Bridge - Android version history
https://en.wikipedia.org/wiki/Android_version_history - Google Scholar Google Scholar
https://scholar.google.com/scholar?q=Android+downgrade+rollback+protection - Google Scholar Google Scholar
https://scholar.google.com/scholar?q=how+to+flash+Android+factory+images+fastboot - Google Scholar Google Scholar
https://scholar.google.com/scholar?q=bootloader+unlocking+Android+security+rollback+attack - Google Scholar Google Scholar
https://scholar.google.com/scholar?q=how+to+downgrade+android - how to downgrade android - Search results
https://en.wikipedia.org/wiki/Special:Search?search=how+to+downgrade+android - https://www.ncbi.nlm.nih.gov/search/research-articles/?term=how+to+downgrade+android
https://www.ncbi.nlm.nih.gov/search/research-articles/?term=how+to+downgrade+android