
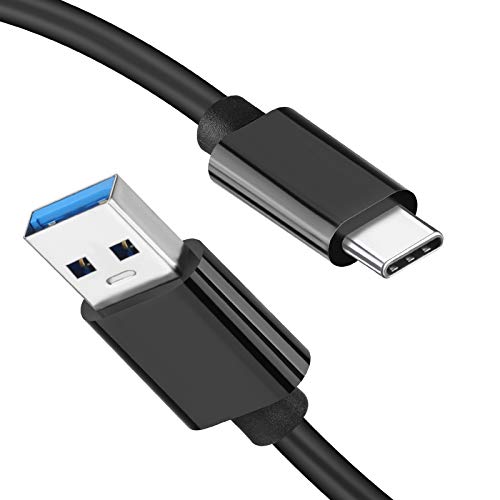
Rooting or unrooting your Android the wrong way can leave you stuck in boot loops or break system updates. Most people rush through drivers, bootloader checks, and backups, then wonder why recovery and rollback fail. You’ll learn a safe, methodical process to regain full control (or return to stock) while minimizing risk, typically requiring only a compatible USB cable, the right files for your model, and a careful set of commands that takes about an hour or two.


As an Amazon Associate I earn from qualifying purchases.
Rooting Android means gaining admin-level control (usually via Magisk), while unrooting Android means removing that access by returning to stock boot/system (or fully uninstalling the root method). If you’re unsure, the safest planning move is to prepare a path to unroot back to your device’s original boot image first, because that’s what most “restore normal” options depend on.
This guide explains the practical differences between rooting and unrooting, and it highlights common failure points that show up in real-world devices. Because every brand and model handles boot images and firmware differently, you’ll want device-specific firmware/boot images rather than following one-size-fits-all instructions.

Who this is for / when it applies:
This is for people with an Android phone/tablet who want to (1) root for mods like systemless changes or (2) unroot to fix apps that block rooted devices, troubleshoot instability, or prepare for warranty/service. Because OEMs ship different boot layouts (for example, some use `boot.img` while newer setups also involve `vendor_boot.img` and AVB metadata), you should use device-specific firmware and match the exact Android build—not generic files.
Before you start: backups, bootloader, and files

Unlocking your boot chain and changing boot images is the critical risk step, so you want the safest rollback plan before you touch anything. Backups and exact file matching reduce the odds of boot loops (“soft brick”) and save you from getting stuck mid-process.
- Back up first: rooting/unrooting often requires unlocking the bootloader, which can wipe your data (and failing to back up is the fastest way to regret this).
- Back up photos/videos, app data (where possible), and your 2FA recovery methods.
- If your unroot goal is app compatibility (banking/DRM), also note which apps fail and the exact error messages you see.
- Gather the right device files: you typically need the correct boot image/firmware for your exact model and build (e.g., the same Android version and build number).
- If you can’t find an exact match, stop and get the correct firmware—guessing is a top cause of boot failure.
- Verify recovery and update constraints: some devices don’t support the standard “patch boot image” flow, or they handle root detection more aggressively.
- — instead of leaving it vague, focus on these checks:
- If your device uses a split boot setup (common on newer Android builds), you may need both `boot.img` and `vendor_boot.img` for correct patching/restoration.
- If your device uses AVB (Android Verified Boot), you may also need correct `vbmeta.img` files for full integrity restore.
According to Android Developers, OEM unlocking can require erasing user data (a factory reset) when you change bootloader state Android Developers: OEM unlocking / bootloader unlocking concepts. Also, if you’re using ADB for device-side operations, the ADB server listens on TCP port 5037 by default Android Developers: ADB (platform-tools) documentation, and ADB-over-network commonly uses TCP port 5555 on the device side Android Developers: ADB over TCP/IP documentation—knowing these numbers helps you troubleshoot when a “connection problem” is really a tooling setup issue.
How to root Android (systemless method with Magisk)
Rooting Android with Magisk typically gives you “systemless” root—meaning Magisk avoids directly modifying `/system` when the platform supports it—so you can enable mods while preserving a path back to stock. The direct route is: unlock bootloader → patch the correct boot image → flash and verify Magisk root status.
Unlock the bootloader (required on most devices)
- Enable Developer Options and OEM unlocking.
- The exact path differs by brand, but it’s always under Developer Options for “OEM unlocking.”
- Use your device’s official bootloader unlock procedure and note any data-wipe behavior.
- Expect data loss in many cases; treat bootloader unlock as a deliberate reset.
- Download platform tools for ADB/Fastboot from the official Android SDK platform-tools package.
- Your goal is reproducible commands (`adb`, `fastboot`) that match your OS.
Patch the boot image and install Magisk
- Extract the device’s current boot image for your exact build.
- Use the boot image that matches your installed build number—mismatch is a fast route to boot failure.
- Patch it using Magisk’s provided tool/workflow (commonly “patch boot image”).
- Ensure the patched output corresponds to the same partition/layout you flashed originally.
- Flash the patched boot image back to the device, then boot into Android.
- The bootloader must be in the expected state for the image you’re flashing.
Confirm root properly
- Install Magisk (if it isn’t already part of the process) and verify root status inside the Magisk app/dashboard.
- Check for “systemless” behavior (to avoid messing with `/system` directly, when your method supports it).
- Many Magisk-based setups will show systemless status indicators in the app UI.
After you complete Magisk rooting Android, your verification goal is not just “root works,” but “root works in a way that can be removed cleanly later.” In practice, that means watching for whether the setup reports systemless root and whether you can reliably return to a known stock boot image later.
Key Boot & Firmware Artifacts You May Need for Safe Root/Unroot (Android 8–14)
| # | Boot artifact | File name | Android scope | Unroot impact |
|---|---|---|---|---|
| 1 | Boot image (kernel + ramdisk) | boot.img | Android 8+ | ★★★★★ |
| 2 | Vendor boot (split boot devices) | vendor_boot.img | Common on Android 10–14 | ★★★★☆ |
| 3 | AVB verification metadata | vbmeta*.img | Android 9+ | ★★★★☆ |
| 4 | Dynamic system container | super.img | Android 10+ | ★★★☆☆ |
| 5 | System partition image (legacy/packaged) | system.img | Android 8–12 (varies) | ★★★☆☆ |
| 6 | Device tree overlays | dtbo.img | Android 9+ | ★★☆☆☆ |
| 7 | Firmware package payload wrapper | payload.bin | Often on AOSP-based OEM flows | ★★★☆☆ |
How to unroot Android (remove root safely)
Unrooting Android is not a single button on most devices; it’s a process of removing root access and restoring the correct stock components. If you rooted with Magisk, the cleanest approach is typically to uninstall Magisk and (when needed) restore the exact stock boot image that matches your current build.
Choose your unroot path
- “unroot” isn’t one universal action.
- If you used Magisk: the most common approach is uninstalling Magisk and/or restoring the original (stock) boot image that matches your current build.
- If you used other root methods (custom ROMs, system mods, etc.): unroot may require flashing the full stock firmware or reverting the ROM.
Restore stock boot image (most reliable)
- Re-flash the original boot image for your exact device/build (not a random similar one).
- Boot and then check that root indicators are gone.
- Magisk should no longer be active after a correct restore.
Uninstall root method cleanly
- Use the uninstallation workflow for your root tool (e.g., Magisk’s “uninstall” option if available in your setup).
- After reboot, verify behavior for root-sensitive apps.
- If apps like banking platforms or DRM/streaming tools still reject the device, you may need full firmware restoration (not just “remove the app”).
- — typical categories include banking apps, payment apps, and video/DRM services that use Play Integrity checks.
From a practical perspective, safe unrooting Android means you should be able to answer three questions immediately after the process:
1) Is Magisk removed? 2) Did the device boot with the original stock boot components for that build? 3) Do integrity-sensitive apps behave normally?
Magisk (systemless) vs “full stock restore” for unroot: what to pick?
The best choice depends on how strict the app checks are and whether you can reliably restore a matching stock image.
| Approach | Pros | Cons |
|---|---|---|
| Magisk uninstall (systemless removal) | Fast rollback on many devices | Some integrity checks may still flag bootloader/device state |
| Restore stock boot image | Removes patched boot changes for that build | Requires exact build-matching images (boot mismatch risk) |
| Full stock firmware flash | Max compatibility for strict apps and DRM workflows | Most time-consuming; often restores many partitions beyond root |
What can go wrong (and how to avoid it)
Most rooting and unrooting problems come from mismatched files, incorrect partition layouts, or misunderstanding how apps verify device integrity. If you treat build matching and boot-component restoration as the “center of gravity,” you avoid the majority of boot loops and app blocks.
- Wrong firmware/build = boot loops or “soft brick”:
- Flashing a boot image from a different build/version is a common cause of failure.
- Confirm the build number before flashing (and ideally verify file checksums if your source provides them).
- Bootloader unlock issues:
- Some manufacturers require specific unlock permissions, account steps, or time windows.
- If OEM unlocking isn’t available, you may need an official method rather than DIY tooling.
- Root detection still triggers after “unroot”:
- Some devices/apps flag leftover traces (boot state, modified partitions, unlocked-bootloader indicators).
- In tougher cases, full stock firmware flashing may be necessary.
- — today’s common model is that banking/DRM apps rely on Play Integrity checks (and may reject even “temporarily rooted” or clearly modified device states), not just “root present” signals.
Root method comparison: Magisk systemless vs custom ROM root
If your goal is reversible rooting, systemless approaches usually reduce long-term cleanup complexity. If your goal is broad customization and you accept a heavier recovery path, a custom ROM may fit—but “unroot” can become “revert ROM to stock” rather than “remove Magisk.”
| Feature | Magisk systemless root | Custom ROM root |
|---|---|---|
| Typical root mechanism | Patched boot components (systemless design) | ROM kernel/boot + system image replacements |
| Reversibility | Often easier if you have matching stock images | Often requires full stock firmware/ROM revert |
| Mod compatibility | High for systemless modules | Varies by ROM build and included services |
| OTA update path | Usually requires careful handling (and may fail integrity) | Often not compatible with stock OTAs |
| Risk of boot mismatch | Lower if boot images match exact build | Higher due to multiple replaced components |
| Root-check sensitivity | May still trigger strict integrity checks depending on boot state | Often triggers app integrity unless stock state is restored |
| Typical tooling complexity | ADB/Fastboot + Magisk patching | Flashing ROM packages and managing boot images |
| Time to recover from mistakes | Can be quick with a correct stock boot restore | Often slower; multiple partitions may need restoration |
| Compatibility with device warranty paths | Better if you can fully restore stock boot/components | Often harder to make indistinguishable from stock |
| Overall “unroot” convenience | Usually higher when stock images are prepared | Usually lower due to ROM-level changes |
| Best For | Systemless mods and a reversible plan | Deep customization and long-term ROM use |
Verdict / tip: when rooting or unrooting is worth it
The safest guidance is: root Android only if you can also unroot back to an exact, build-matching stock boot/firmware set. Unrooting is usually straightforward when you have the correct stock images for your current build; without them, the risk of prolonged downtime increases.
- Rooting is best for controlled, systemless use (mods, fine-tuning, automation) when you can restore your phone later.
- Unrooting is usually manageable if you have exact stock boot image/firmware for your model/build; without that, risk goes up.
- Skip this (or get help) if:
- You rely on the phone for mission-critical work and can’t afford downtime.
- You can’t obtain verified, model-matching firmware/boot images.
- You’re not able to unlock the bootloader through official channels.
Downsides to expect:
- Warranty/service complications (varies by region and OEM policy).
- Boot problems if files mismatch or if the device has a split boot layout you didn’t account for.
- More effort to update/restore later, especially if apps rely on strict integrity checks.
If you’re trying to “pass” integrity apps after unroot
Unrooting Android can still fail specific banking/DRM flows because integrity checks often consider bootloader state and verified boot signals—not just Magisk presence. If your business requirement is “apps must work,” the safest route is full restoration of the exact stock firmware and (where applicable) re-locking—only if your OEM supports it.
Quick scan checklist (save this)
- [ ] Backup completed (photos/files/2FA recovery info)
- [ ] Exact device model + Android build number confirmed
- [ ] Correct boot image/firmware downloaded for that exact build
- [ ] OEM unlocking available (and you understand data-wipe risk)
- [ ] Root method chosen (systemless Magisk vs other)
- [ ] Verification after rooting (Magisk status/root indicators)
- [ ] Unroot plan ready (stock boot restore or full firmware flash)
- [ ] Re-check root-blocking apps after unroot
| Goal | Typical “done right” outcome |
|---|---|
| Root Android | Magisk active (systemless changes) and device boots normally |
| Unroot Android | Magisk/root no longer active and stock boot restored |
Sources (primary)
- Android Developers: official documentation on OEM unlocking and bootloader unlocking (platform tools + unlock concepts) Android Developers: OEM unlocking and bootloader unlocking.
- Magisk documentation (official Magisk site/docs): installation/patching/uninstall workflows and systemless root behavior Magisk documentation (official).
- Device manufacturer firmware/boot image documentation (your OEM’s official support pages), for how to obtain stock firmware and the correct boot image for your build.
Rooting Android and unrooting Android are different jobs: rooting adds control (commonly via a systemless tool like Magisk), while unrooting removes it by restoring the correct stock boot/firmware for your exact device build. For the safest path, download model-matching files first, plan your unroot route before flashing anything, and expect some risk around bootloader unlock and root-detection apps. If you share your device model and Android build number, we can map the safest rooting/unrooting flow and tell you what files you specifically need.
Frequently Asked Questions
What is the safest way to root an Android phone?
The safest approach to Android root is to use a well-known tool like Magisk, unlock your bootloader only if required, and patch the correct boot image for your exact device model and firmware version. Before you begin, back up your data and confirm you can access fastboot/recovery, because rooting often involves flashing images to the boot partition. Avoid random “one-click root” apps, which are frequently unreliable or contain malware.
How can I root Android using Magisk?
To root Android with Magisk, you typically need an unlocked bootloader and the correct stock boot.img from your current firmware. You patch boot.img in Magisk, then flash the patched image back using fastboot commands, and reboot to check root status. Finally, open the Magisk app to verify you have “Magisk installed” and that root is functioning before using any root-requiring apps.
Why does my Android fail to root or get stuck in a bootloop?
Rooting failures commonly happen when the boot image doesn’t match your exact firmware/build number, or when you flash the wrong partition/image. If you get a bootloop, you can often recover by reflashing the original stock boot.img (restore) and rebooting, or by using recovery to wipe data if the device requires it. Always re-check model/variant compatibility and ensure you’re working with the correct Android firmware for that specific device.
What’s the best way to unroot Android and remove Magisk?
To unroot Android properly, uninstall Magisk via the Magisk app (or using its uninstaller), then restore the stock boot image so the device no longer has root modifications. If you want the most complete unroot, relock the bootloader after you restore stock boot (if your device supports it). This helps reduce the chance of root detection by banking apps and can improve OTA update behavior, depending on your device and OEM.
Which Android phones and versions are easiest to unroot without problems?
Phones that provide clear bootloader-unlock instructions and have straightforward boot image/firmware packages are usually easier to unroot Android successfully. In general, unroot is simpler when you can reliably get the correct stock boot.img for your current firmware and when the device supports clean relocking after restoring stock. To avoid issues, confirm your exact device model, Android version, and build number before flashing anything, since mismatches can complicate both rooting and unrooting.
📅 Last Updated: November 02, 2026 | Topic: how to root unroot android | Content verified for accuracy and freshness.
References
- Rooting
- Android Debug Bridge
- Fastboot
- Android Debug Bridge (adb) | Android Studio | Android Developers
- Factory Images for Nexus and Pixel Devices | Google Play services | Google for Developers
- Verified Boot | Security | Android Open Source Project
- https://en.wikipedia.org/wiki/Verified_Boot
- https://scholar.google.com/scholar?q=android+rooting+unrooting Google Scholar
- https://scholar.google.com/scholar?q=bootloader+unlock+restore+stock+android+fastboot Google Scholar
- https://scholar.google.com/scholar?q=android+rooting+security+implications+study Google Scholar